I love coffee (hot, iced, whatever)! I also love decorating with coffee. It’s so much fun and very practical, so today we’re going to give you some suggestions and ideas to:
Create a Coffee Bar in 4 Simple Steps

Step 1- Choose your Space
This is where your coffee bar will find it’s home. You will need to carve out a space such as an existing hutch, or a built-in desk that is no longer serving its original purpose…hmmm…You might even try a standalone piece like a sideboard, island or dresser. Then there’s always the option of using extra counter space. Ha! Who has that?
Check out this link for some inspiration
Step 2- Choose your Host Piece
Okay, so what if you’re good to go on the location, but are lacking the actual piece of furniture needed to create your new coffee bar? What to do, what to do, lol. My favorite places to look are tag sales, antique shops and family/friend hand-me-downs. Then there is always the chance that you can find “it” on the roadside. That would be a lucky score.
Usually these pieces are pretty homely, but you’re going transform this Baby with some paint and a little tlc and you’re good to go!
Take a look at this transformation. One of my coworkers received an old hutch base from a relative. Amazing!

Step 2- Choose your Host Piece

BEFORE- Plain old hutch base

AFTER- Beautiful Coffee Bar
For this project, I decided that I would use one of the pine islands that we’ve got kickin around here at Kloter Farms.
Step 3- Select Your Coffee Maker
Everything can look all neat and pretty, but if the coffee is lousy, it’s a no go. For the sake of convenience I chose to use a Keurig, but you can use whatever machine you wish.

Step 3- Select your Coffee Maker
Total side note- do you know how to say Keurig? Say it right please! Reach way back into your Dutch roots and see if you can master it. If you pronounce it ‘Cure-ig’, you’re way way off… If you pronounce it ‘Keer-ig’, you’re getting warmer… If you pronounce it ‘Keer-ech’, you deserve a gold star, a pat on the back and a cup of coffee on the house!
Now you’re educated, and have no excuse to mispronounce it! Ya, right lol.
Step 4- Decorate
To start with, I felt like I needed some texture and color, so I added a runner. I’m not a straight-line girl so I put it on an angle.
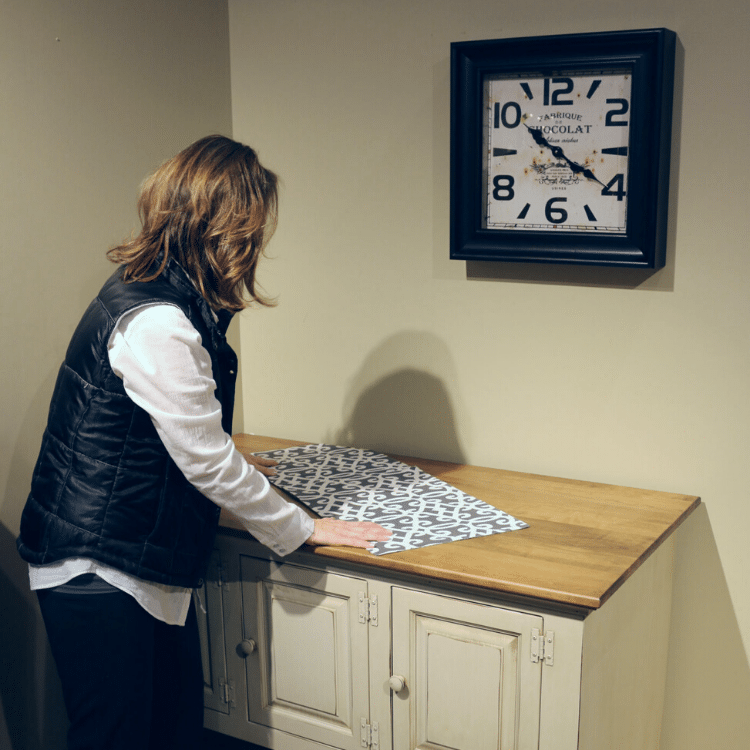
Add a Runner for texture and color
For my coffee bar, I’ve chosen to use a chalkboard. I love the versatility of a chalkboard. I’ve written ‘Morning Coffee’ on it, but if you’d rather write something like ‘Morning Grind’, or ‘Good Morning Sunshine’, help yourself. It’s also fun to be able to shake it up if you’re having a party or some other celebration and need to change the lettering. Thus, the chalkboard idea.

Bring on the Chalkboard!
Next decision is where to place my coffee maker. He is after all the key player.

Place Your Coffee Maker
I’m now going to place my essentials– the cream and sugar. You can really use any kind of tray or plate to place your containers on. Today, however, I’m going to use a pedestal. I love to use things that are clean-lined and fun but also serve as double duty pieces.

Adding the ‘Essentials Stand’
I really love this one because it has metal and natural wood on it. Plus you can use it for a cake stand, or plate stand, or anything else that you want to put in a stand. So many uses, so little time…
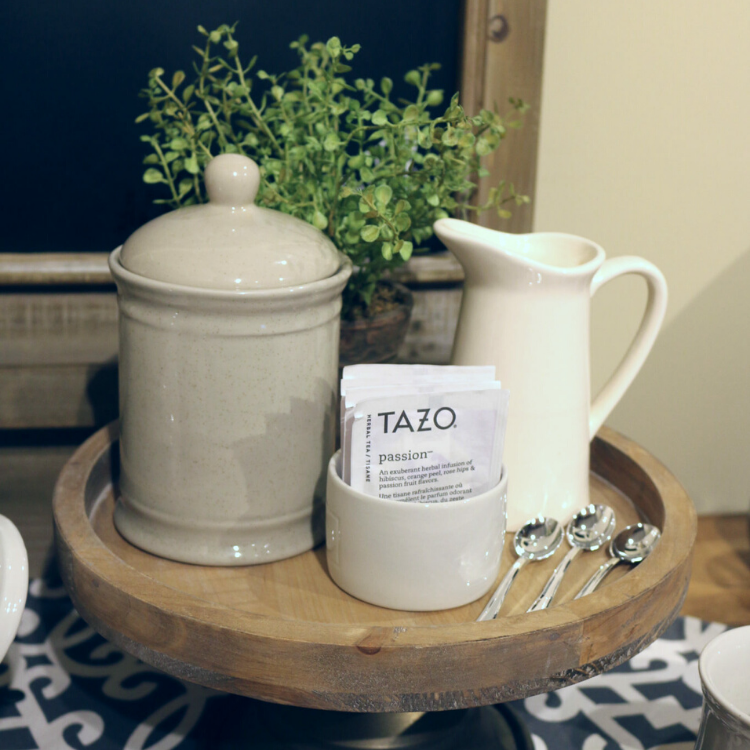
‘Essentials Stand’
I’ve placed my creamer and sugar on it, and I’m also going to add a plant and some tea bags. It’s clean, it’s fresh, I like it. Remember it’s one of the first things that you see in the morning, so be sure that you love the look of it.
Ok, so next I’m going to place my coffee bean containers. I’ve decided to use glass vessels to show off my coffee beans in all of their glory, but you can use whatever you have around the house.

Coffee… Ahhhh…!
Sniff… There is seriously nothing like the smell of fresh coffee beans… Sniff… Ahhhh…
We need a place for our mugs, so I’m going to add my mug tree next. I’m going to use this simple black wrought iron one and pop it in behind the glass vessels containing the deliciously aromatic coffee (sigh).

Mug Tree and Coffee Canisters
A little tweak here and a little tweak there, and we’re done. Coffee Bar 101 is completed. Simple!
Create a Coffee Bar- Finished!
Now it’s your turn! Totally enjoy that first cup of the morning!


")


")


